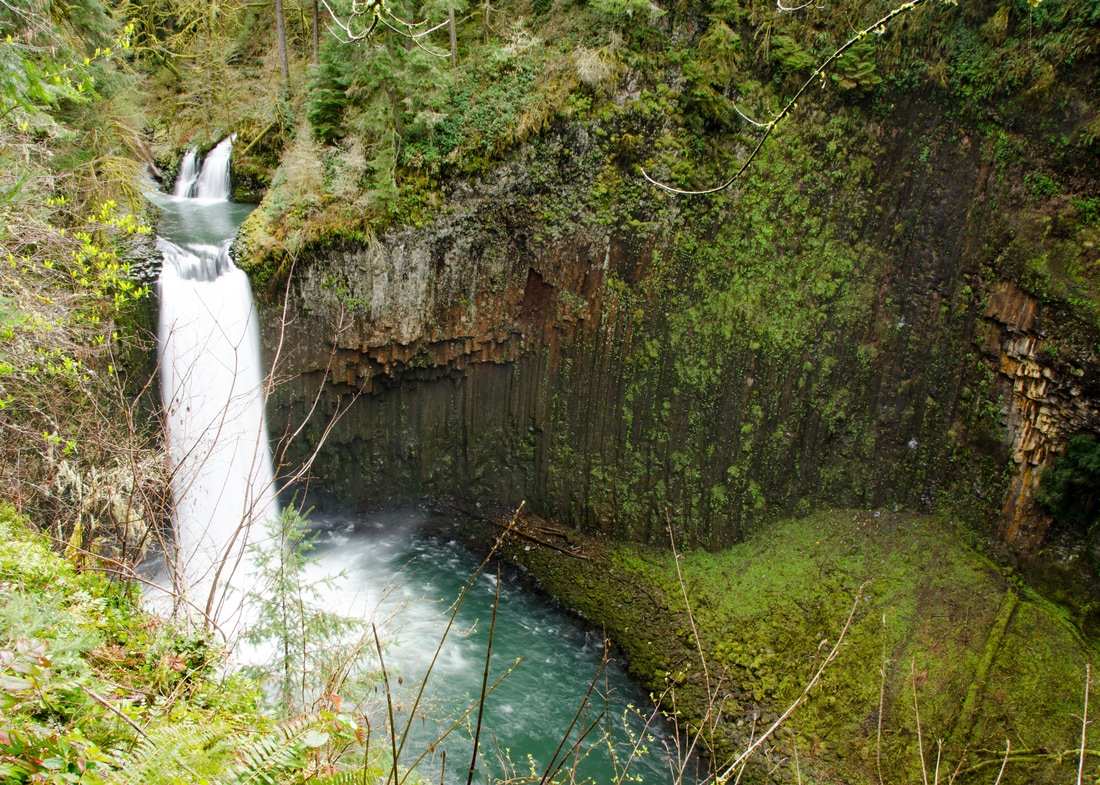
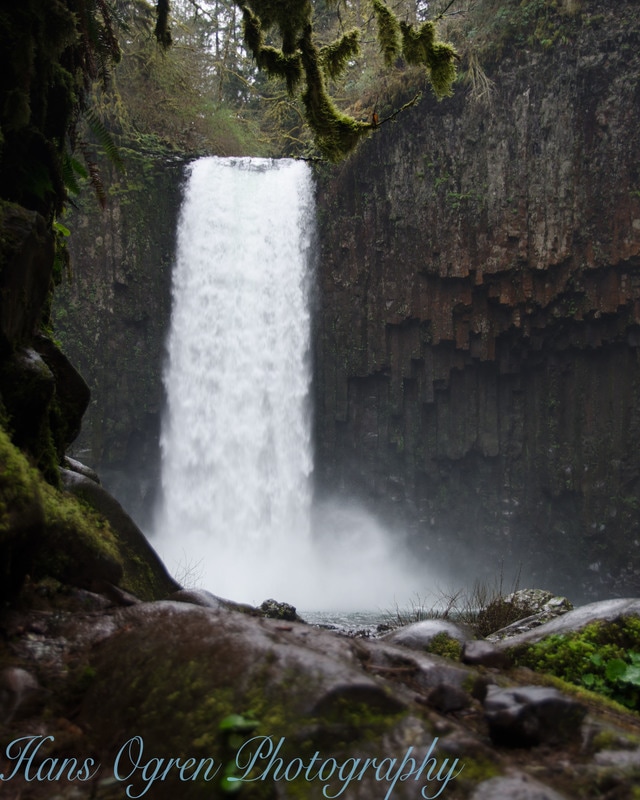
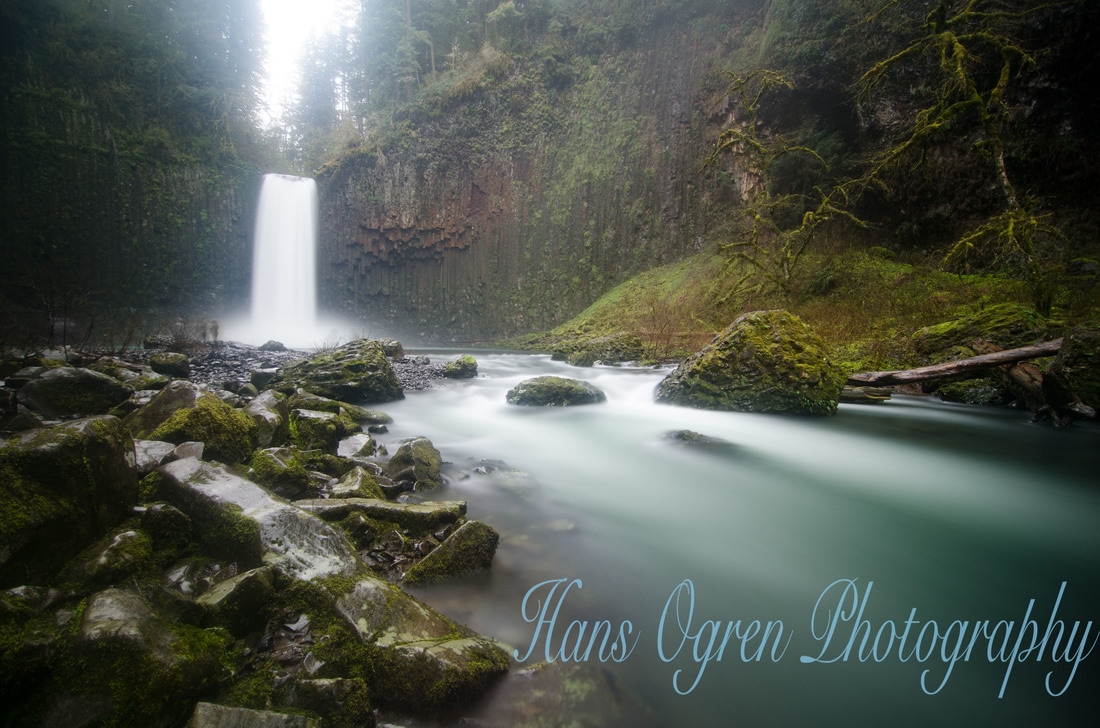
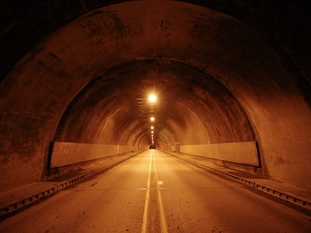
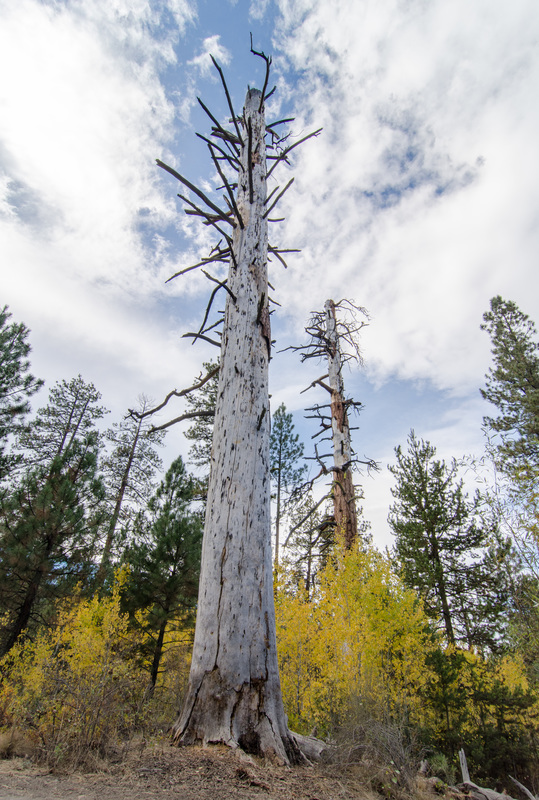
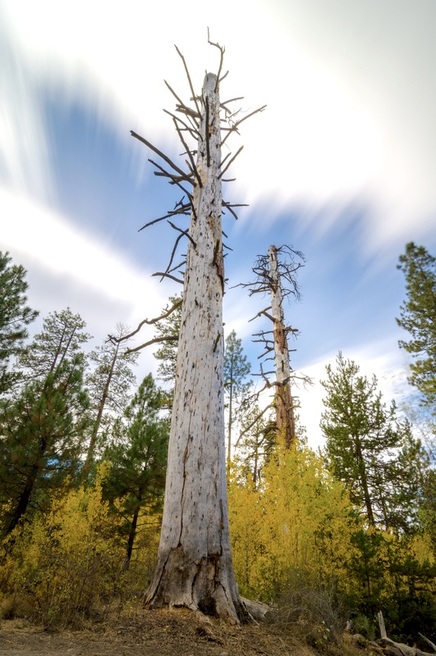
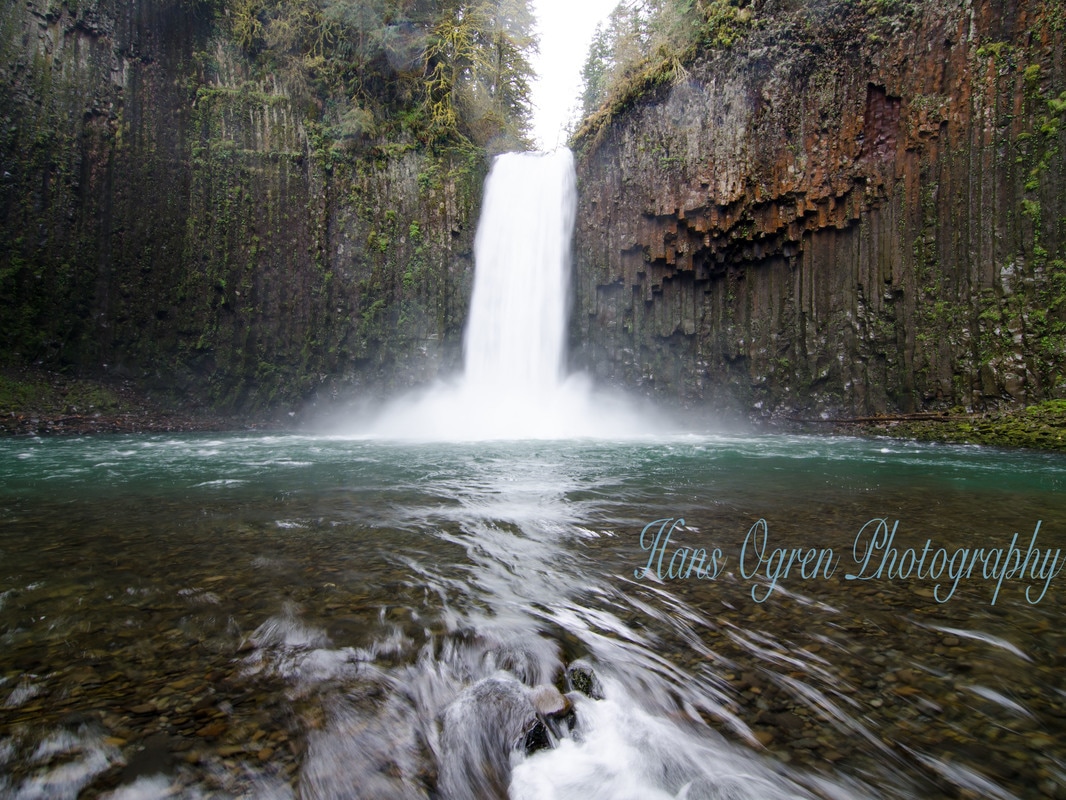
 In the Basin of Abiqua Falls.
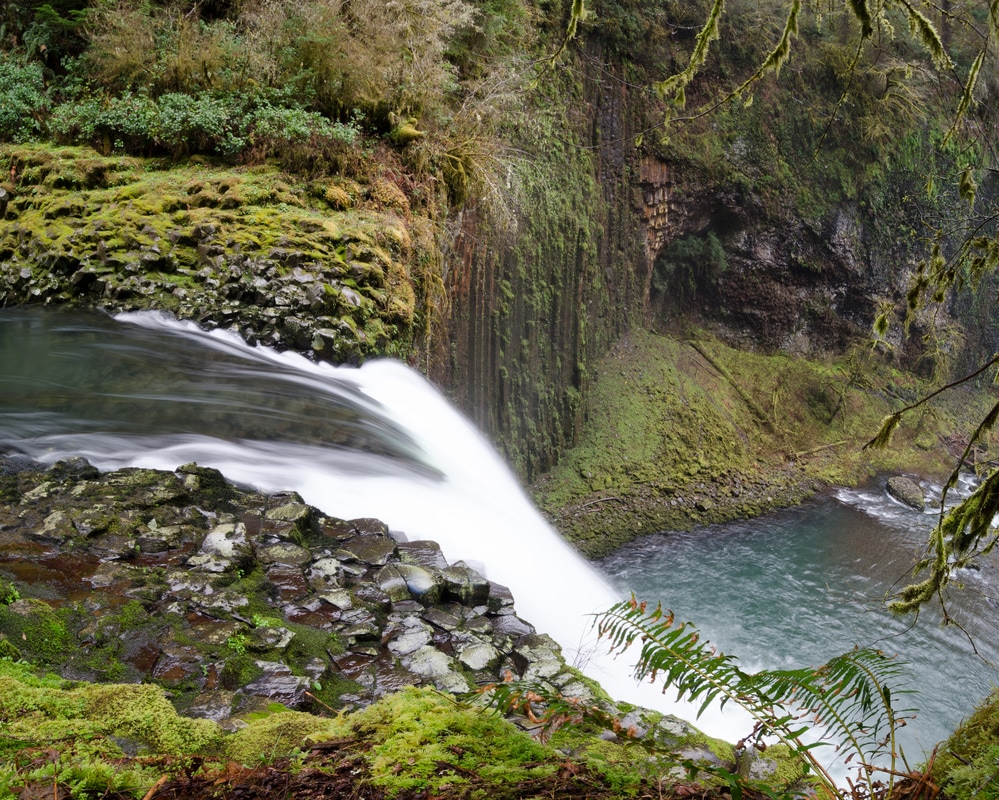
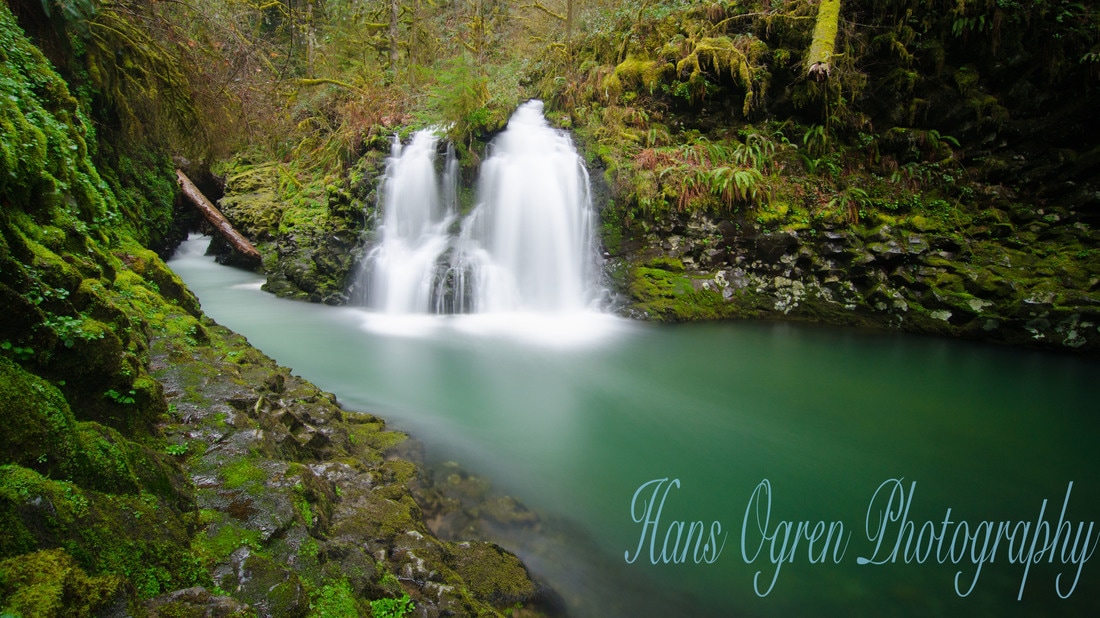 Smaller waterfall right above the main Abiqua Falls. A 3 minute exposure to wash away motion, and f-12 to get more focus depth.
There were a few other people that came and went as I set up some longer exposure shots, but for the most part it wasn't too crowded. The constant mist coming off of the waterfall made it challenging to keep the lens and filter clear of mist (it was a losing battle), but I managed to get some nicer images before everything was damp.
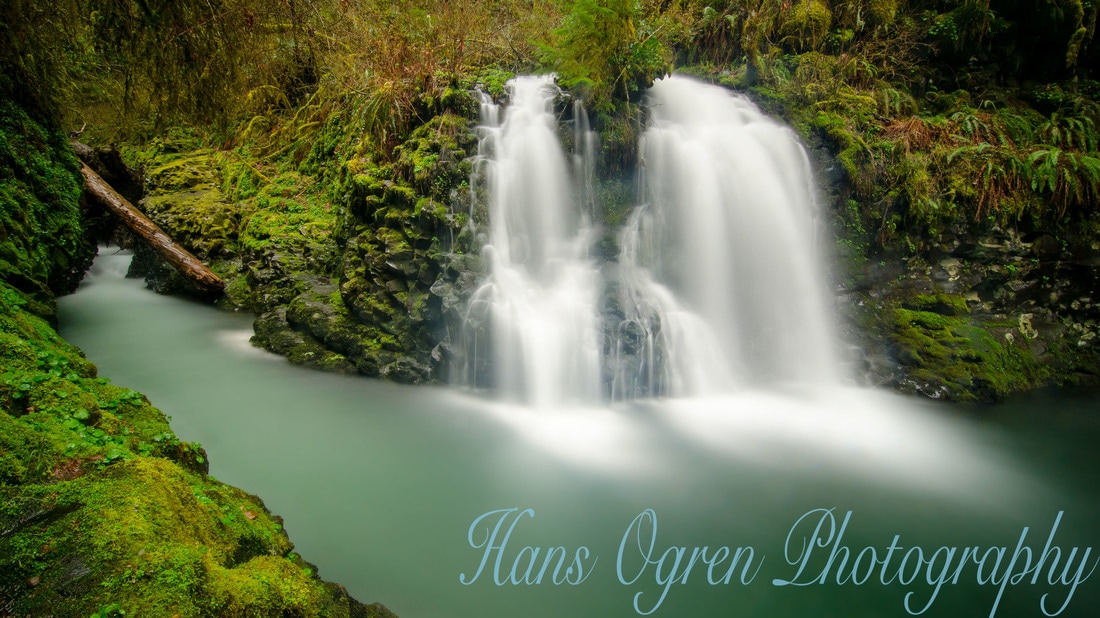
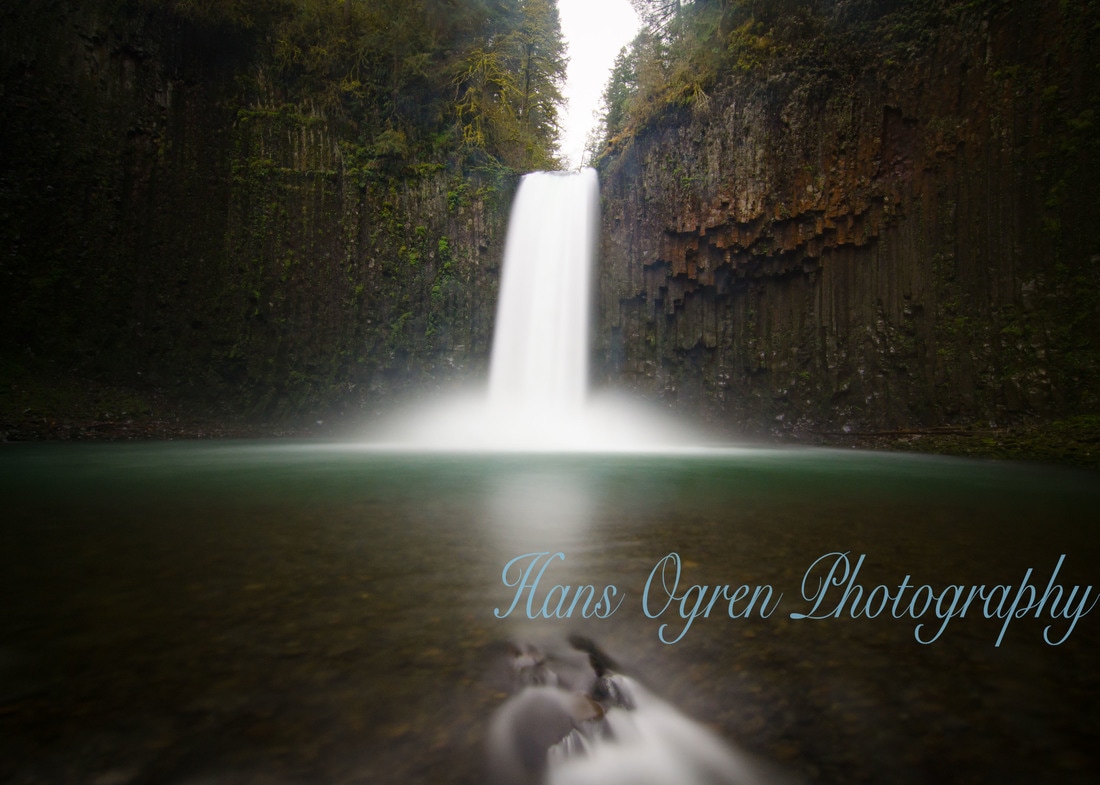
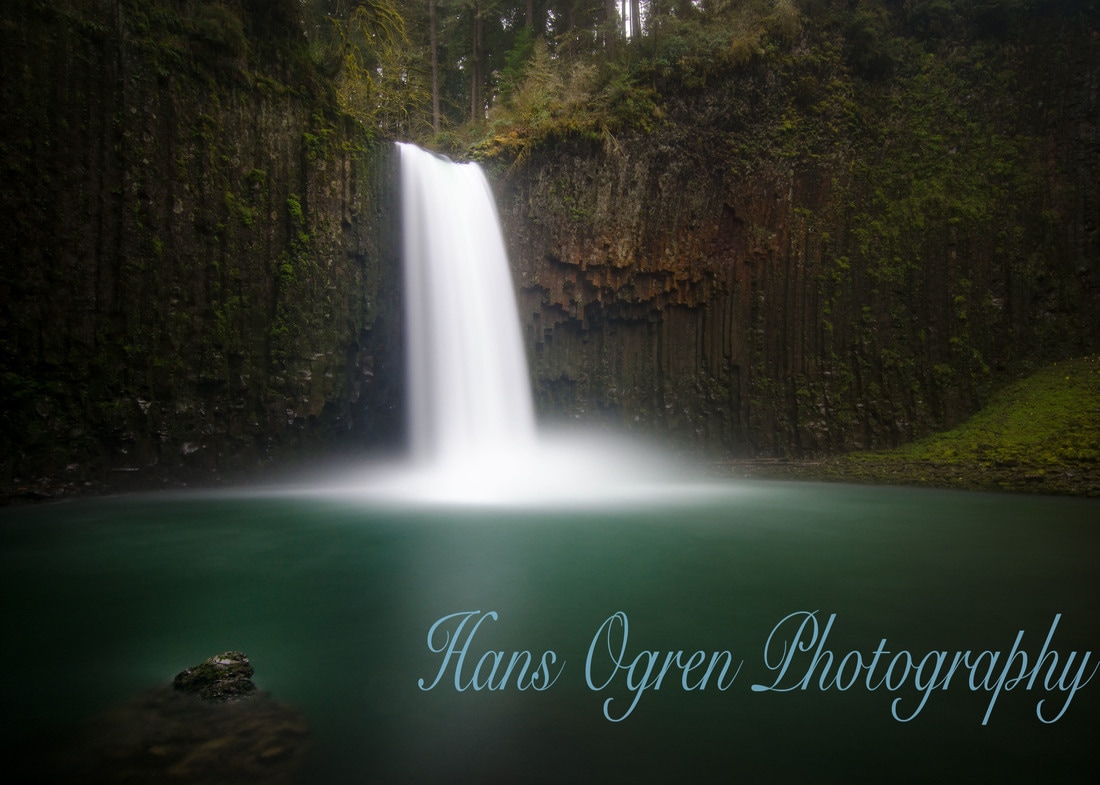
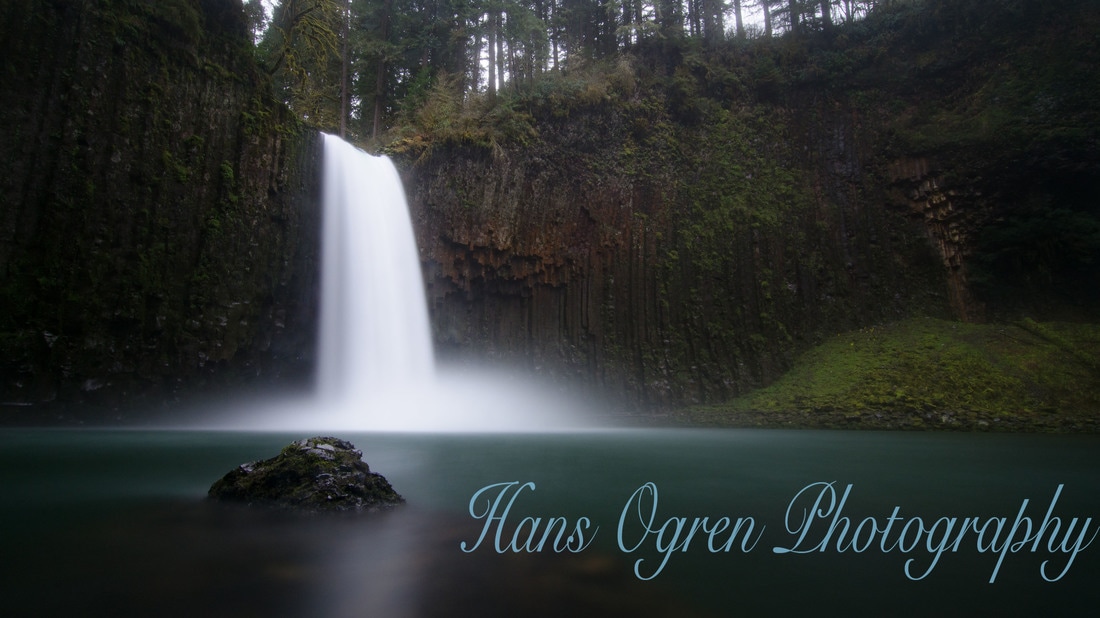 Abiqua Falls Wide Shot 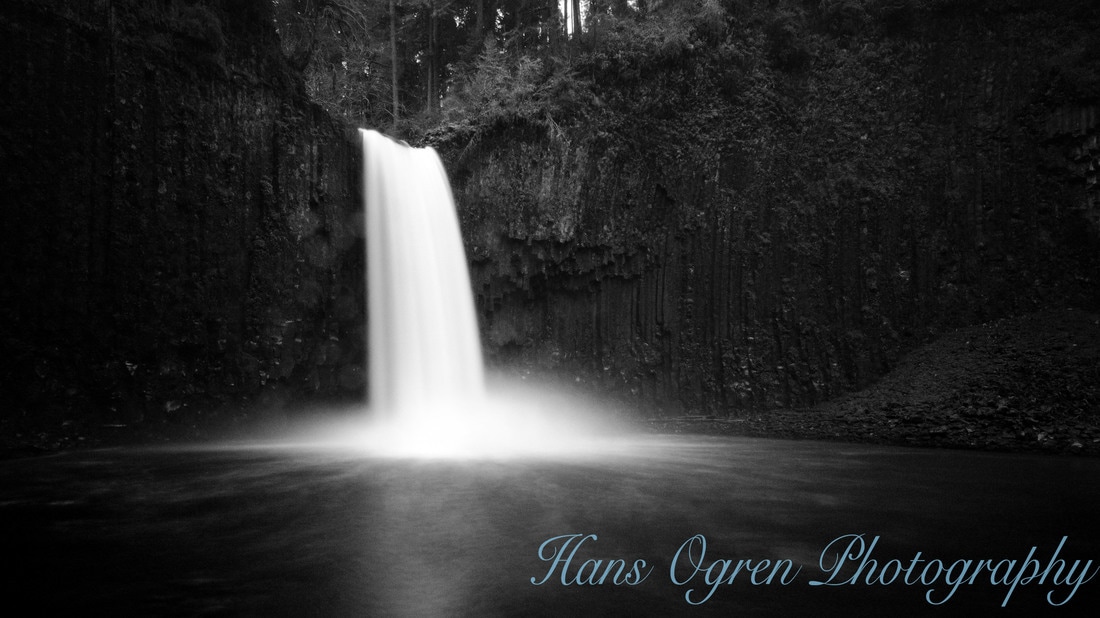 Abiqua Falls B&W With the ambient light filtering through the clouds and trees, the exposures were taking around 4 minutes, making me much more selective and precise with the angles in photos that I was looking for. It also made it much more likely to have a whole bunch of misty spots end up on the lens, and everything was so soaked that I couldn't wipe away the water without leaving more water behind. All in all, it was a good day for a hike and a pretty waterfall.
Most of these images are also on my smugmug site. If you like a particular photo and want a print of it (without my name scribbled on it) just click on the image and it should take you to the corresponding page, and Thanks!
0 Comments
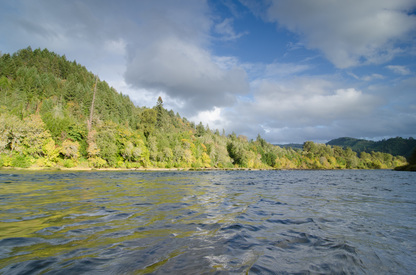
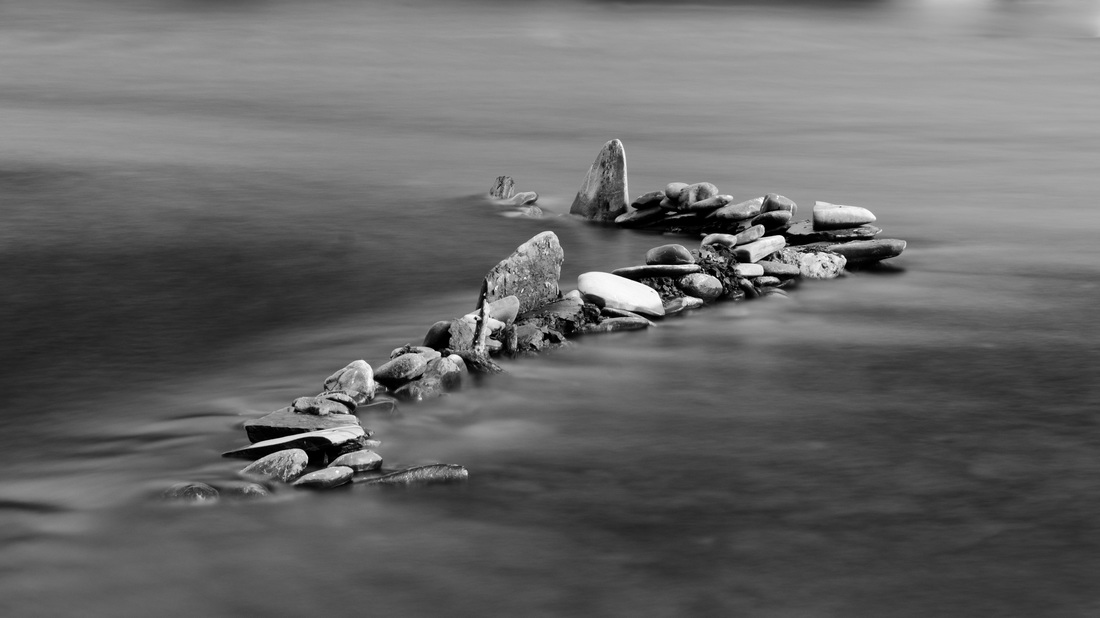 A 45 second exposure smooths out the river's water flowing around these stones, leaving the motionless stones in stark contrast to the blurred water Long exposure times are an interesting tool that can give your photos a new artistic quality. It does, however, require more time (obviously) and potentially some extra tools to help your camera slow down the shutter speed. I'll try to explain how you can get most any camera to do this to some extent, as long as it gives you the power to control certain aspects of your camera's settings. How can you take motion in an image and blur it?
Previously, the only way I've been able to slow down my shutter speeds without overexposing the image is by using a couple tricks most any camera should be able to do (as long as it gives you the control to do so) : ISO Settings, and Aperture.
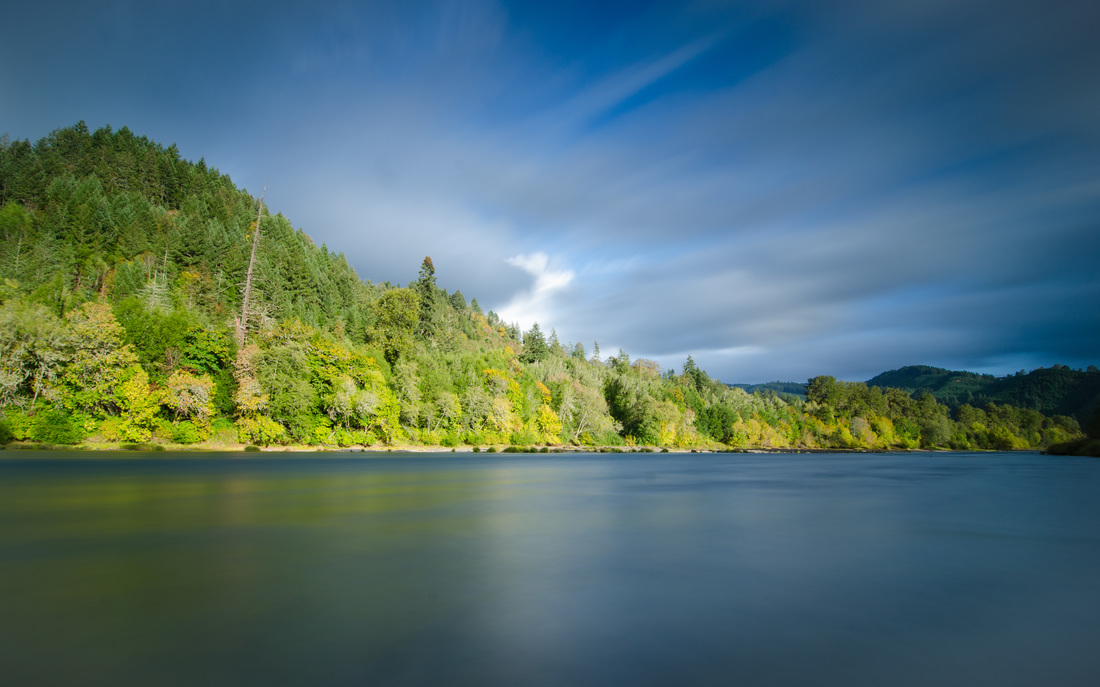
All of these ISO and aperture settings will only allow me to go so far though with longer exposures, since by having to change them I end up affecting some other aspect of my image. Having a low ISO setting (ISO 100 for instance) will actually help with the clarity of the photo while also helping increase exposure time necessary, but setting the lens aperture at its smallest opening (f26 for example) does affect the overall amount of the image in focus, while also deteriorating image quality (through diffraction, too in depth to explain here). There is one extra tool that you can use for long exposures, though, that also gives you more freedom with other camera settings. Lens Filters are what really allow you to control shutter speed and give you the capability to really take control of exposure times. A lens filter is basically a piece of glass you put in front of the lens to affect the amount of light making it to the film/sensor. Some filters help with colors in the image (UV haze), some help with reflections from shiny surfaces (polarizers), and some help with light exposure (neutral density). Neutral Density (ND) filters are designed to help even out the lighting in your pictures, or change the amount of light (and therefor exposure time needed for the image). I've recently gotten a really dark ND filter, which is basically a near-opaque piece of glass (Lee "Big Stopper" filter). It reduces the amount of light that can make it through the lens drastically, increasing the amount of time necessary for the image to gather light. It allows me to compose an image and choose the aperture that I want to use in order to get the cleanest picture I can (and potentially what I want to be in or out of focus), and still get the motion blur that I like from the longer exposure time.
In order to keep the camera steady for this length of time, I have to use a tripod to hold the camera. I'll compose the image, choosing what I want in the frame and where, and controlling the ISO settings and aperture. Once I do that, I take a few images and check the exposure of the image. Once I've got it dialed in to what I want the exposure to look like, I put on the dark glass filter in front of the lens. The filter is so dark that the camera sensor cannot even tell what is in front of it anymore, so I have to make sure I turn off autofocus (since it will attempt to focus on nothing). I set my camera so that I can control the shutter speed manually, and do the calculations to determine what the new exposure time needs to be in order to achieve the same exposure without the filter. LEE also sends a little card with the Big Stopper Filter that tells you what shutter speed you should use with the filter on vs. off the lens.
By using the filter, I can blur out clouds moving across the sky, waves of the ocean, or any other motion in an image and help focus the viewers attention onto the part of the photo that I wanted to draw their attention to. It allows me to create images that I could not really make without it. Sure, with all of my camera tricks to increase exposure time (ISO and Aperture settings), I can usually change the shutter time from 1/60 second to 1 second. With my dark ND filter, I can change that 1/60 shutter speed to a full minute.
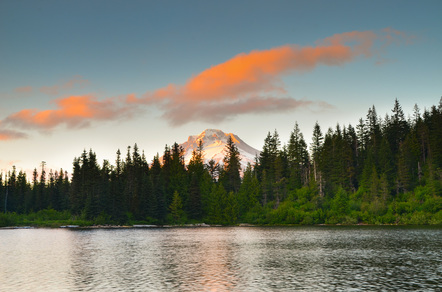
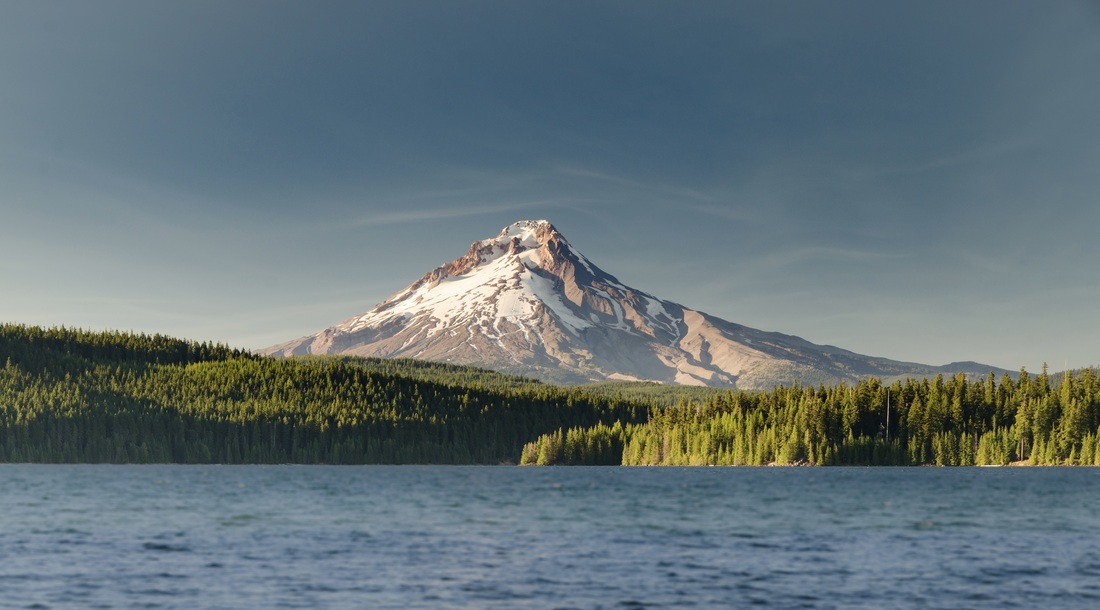 Month Hood over Timothy Lake
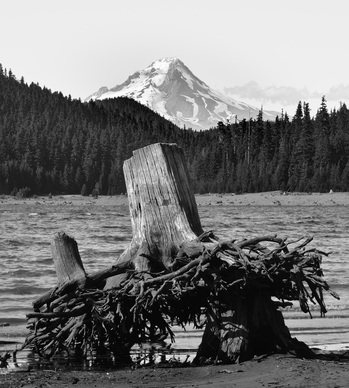
The past few weekends I've been trying to get out and take some more hikes (and pictures). So far I've been to Clear Lake (misleading name), Mirror Lake (maybe if the wind had died down) and Timothy Lake (no sign of Tim). It gave me a chance to get some new blisters and find some new landscape photo opportunities. Without many clouds, and dealing with whatever the sunlight gives you to work with, it really makes a difference as to what time you are trying to take landscape photos. For the vast majority of the day, the sun it "up" somewhere above you, casting harsh shadows (unless their are clouds). This is the easiest time to take pictures, since it lasts the longest and when most people are awake and about. Dramatic landscape photos, however, happen during that first hour of dawn or the last hour of dusk (for the most part). It creates more intriguing shadows, and the colors of the sky (or clouds) become more dramatic. Unfortunately, I'm not much of an early morning person, especially if I first have to drive the two hours and hike in the darkness to get set up at the right spot. Fortunately, with day hikes, I do get to experience dusk. For my hike at Clear Lake, I was only there during the middle of the day; non-exciting light conditions with harsh shadows. The best landscape photo opportunity that I came across was one of the tree stumps around the lake's edge. The lake had been damned previously, and trees along the rising water's edge had been cut down. With summer heat and the water lowering, the stumps had become uncovered again. This stump, which had been floating, got stuck on another stump and a rock, leaving it raised out of the water on a natural pedestal. It made for an intriguing image in an otherwise harshly-lit photo. Changing it to black and white helped draw the focus and attention to the photo onto the stump instead of the vividly green trees behind it. After hiking around Clear Lake and on my way home, I happened to pass by the trailhead to Mirror Lake. The sun was starting to sneak towards the horizon at this point, so I decided it would be worth it to hike up to the lake and see if there was a chance to get a better shot of Mount Hood. I managed to hike up to the lake just in time to set up and take a few shots before the sun set completely. The few clouds that there were really added to the photo, nestling Mount Hood between the lake and trees with the sky above. I should have remember my headlamp though; hiking 2 miles in the dark back to the car using your iPhone's light function on a twisting dirt trail isn't recommended. Timothy Lake was more of a hike than the others, but the view and the timing turned out one of the better photos of the three hikes. Maggie had gotten the day off, and we decided to hike around the entire lake. I knew where I wanted to end up as dusk approached so that we would be on the correct side of the lake from Mount Hood, so we roughly planned our hike around that. 13 miles and 5 hours later, along with a few new blisters, we had completed the entire trail loop around the lake. We happened upon a sheltered cove with a stunning view of the mountain at the perfect time for the sunlight to create shadows across the forested hillsides. It wasn't quite truly dusk, but the angle of the sun across the mountain and forest made for the best shadows, adding an aspect to this photo that wouldn't have been possible during the middle of the day. I also ended up using two filters in front of the camera's lens; a polarizer to deepen the sky's blue hue and stop reflections off the lake, and a Neutral Density gradient filter (Half the filter is clear, the other half is darkened, used to help darken the sky more and lighten the foreground). It was the best light with the best view of the three hikes.
|